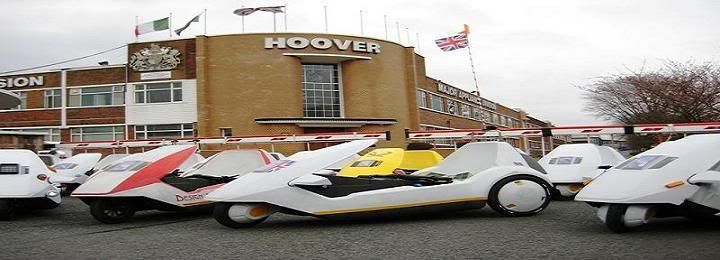
My C5 up and running - Phase 2 - 24v conversion

Started by Lancealot, 01, January, 2011 - 16:15:03

Previous topic - Next topic

Lancealot

Hi all just got my C5 working for its first run and had to wait until today (1.1.11) especially as the snow has just gone in Manchester!!!!!


See it running  - http://s1081.photobucket.com/albums/j346/LanceColwyn/?action=view&current=01012011232.mp4

thanks to Chas, Radiomarty, Neil (the plumber) & Marc for parts.

I hope this is my first one of a few and Happy New Year to all.

Thanks Lance


C5 ENTHUSIAST + RESTORER

Well done what a great job looks like it was made yesterday ...bye Chas

Retro Andy

Looks really good, well done, really like the wall brackets to keep it on, will have to do something like that for mine to make room in the garage for the X1 when it comes.

Retro Andy.

gowrings c5

nice job! looks new. would love to know where to buy those wall brackets  ;)

marcdonnelly

glad the parts helped great c5 well done.

plumber

nice to see a c5 back on the road....well done m8 ;D

the plumber

radiomarty

Looks really good bud - well done glad to have been of assistance.

Karl

Nice to see another c5 saved and back on the road, excellent job mate  :)

alexbromo

Very nice C5, Lance ... many, many compliments !

Wish you have a lot of fun with your trike !  ;)

Alex Bromo

frankev

Nice work, well done, but one question, how do you get it on these wall brackets.
(and off again). If I would try that, ;D it would look like old in a day or two again. ;D

Lancealot

I use gloves !!!!!!!!!!!!!!!!!!!!!!!!

No only joking, takes two of us to lift off without touching the white body. Getting to old to lift on my own.
thanks

Lance


frankev

Ah,

That explains a lot. In my case, my kids are to young  ;D ;D
guess I should try to make it so it works like an elevator. I do have an old 24 V engine here somewhere.
Nice cleaning job on your C5 btw.

greetz

Frank

Lancealot

#12
Hi all,

This was my first C5 and at the time when I bought it I only cleaned it up, regressed bearings and got it up a running. It has been used for the last 6 months continiously.

Now that I have two others that have been fully restored I have decided to do a full refurb on this one and make it 24v.  I have started to strip it down and have ordered the 4QD Uni 8 controller with twist throttle grip (Thanks Chas for the info).

I will be looking at modifying their condition meter board so that it works within the normal POD. Now to look at using the feedback from the twist throttle to utilise the power side (anyone done similar as don't want to have digital displays).

I will also be looking at a different gearbox / chain drive (unless dragon technology works) as will be looking at a 36v turbo type button but we will see....................

Photos to follow

Lance


PLOD11

I have asked a mate of mine if its possible to design a board that will replace the POD PCB with and exact same size PCB to work with a 24 /36 volt mod, using two driver chips to just give current and volts.

He says it can be done, and would use the led bar graphs from the existing pod.

But thats all it will indicate, just amps and volts....

Will let you all know how this gets on ...

Karl

Quote from: PLOD11 on  31, August, 2011  - 10:36:36
I have asked a mate of mine if its possible to design a board that will replace the POD PCB with and exact same size PCB to work with a 24 /36 volt mod, using two driver chips to just give current and volts.

He says it can be done, and would use the led bar graphs from the existing pod.

But that's all it will indicate, just amps and volts....

Will let you all know how this gets on ...

...that sounds like a sensible compromise and more than suitable  8) If he can get them running I'd definitely have a couple of those for future restoration projects as it would keep the original look but help with reliability. Hope he can pull it off  :)